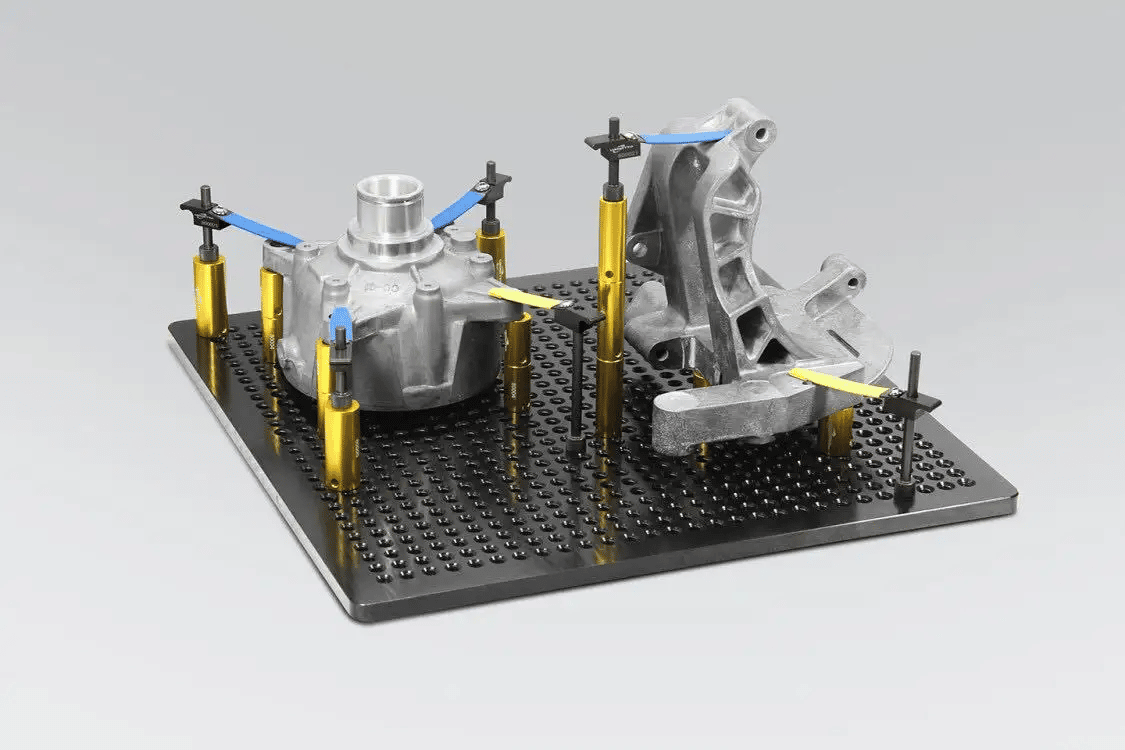
Before measuring many workpieces, it is best to clamp them securely so as to avoid errors caused by workpiece shaking. For different types and shapes of workpieces, we can use different combinations for rapid clamping. This article briefly summarizes the flexible fixture and the clamping idea of coordinate measuring machine.

1. Force measurement
When choosing the clamping method for CMM service, the user should understand the impact of the force measurement, the coordinate measuring machine is very small when running, generally at 0.05 to 0.2N, but this is the value at the time of measurement, the coordinate measuring machine may have a force of up to 3N in the measurement, because the actual force measurement of some coordinate measuring machines is much higher than the target force measurement.
2. Heavy parts
If the part under test is heavy enough, it can be placed stably on the machine table without any clamping device; The user should be aware that the part is in a free state when measuring, that is, no safety device is required, which is required in some geometric dimension and tolerance standards (ASME). But be aware that heavy parts are bound to cause machine deformation.
3. Lightweight parts
For small, lightweight parts, plasticine, instrument wax, etc. can be used to secure parts, but the user should ensure that all traces are removed from the machine and parts after the measurement is completed, and magnetic and vacuum chucks can also be used as another clamping method. In some cases, to use mechanical methods or vises to fix the parts on the coordinate measuring machine, the user should know that the clamping force will cause the deformation of the parts, so care must be taken not to clamp too tightly, it is recommended to use soft cushions at the interval between the fixture and the parts.
4. Fixtures
The workpiece clamping kit is available and allows the user to construct a simple task-oriented fixture in which the workpiece is mounted. Another good clamping practice is to apply task-oriented grippers that make parts easy to locate, and this workpiece fixture system has the following advantages: short setup and measurement times, which can be done by applying a part of the coordinate measuring machine table surface with known functions. When applying a task-oriented fixture, it should be confirmed that the fixture is clean, that the workpiece is positioned correctly, that the clamping force does not deform the workpiece, and that all measured features are accessible.
5. Bonding
The workpiece can also be fixed directly to the countertop with a glue gun equipped with a suitable glue stick; Obviously, the glue of the sticky granite cannot be used to fix the parts on the granite countertop; The edge of the part is directly fixed and bonded to the countertop, the advantage of this method is that the part will not be deformed due to the clamping force, the user should ensure that all the measured features are accessible, but it must be remembered that the features in direct contact with the table surface are untouchable, and the glue should be removed with an appropriate solvent after the measurement, the main disadvantage of this method is to adjust the workpiece direction with the method of visual inspection. The user must be aware that the applicator should only be applied under the following conditions
- (a) When fixing parts to the countertop with glue, there is no noticeable change in the indoor temperature, or
- (b) The coefficient of thermal expansion of the measured workpiece and the table is similar.
If the temperature of the parts and granite increases, their length will increase according to different rates of change, because the part base surface is glued to the table, the part can not expand freely and thus deform, if the part and the table thermal expansion coefficient is very different, the obvious temperature change will lead to the deformation of the part or table.
Instrument wax is another fixture in addition to glue, which is heated and softened by hand, and the edges of the parts and the table are fixed like glue. Since the instrument wax deforms within an hour of application, resulting in a change in the position of the part, it can only be measured after the deformation period has passed.
The application of elastic restraint materials, such as silicone rubber, allows the part to expand and is therefore recommended.
Any clamping configuration should not be over-positioned, ideally a part is only a little clamping to reduce deformation, but in this way the part may turn when measuring, gent clamping and cushioning between the clip and the part with rubber or cork will help reduce part deformation and damage.