The 3D coordinate measuring machine is a contact measuring machine using a touch probe. Here is an overview of the equipment and the points to be aware of when using CMM for Dimensional Inspection.
What is 3D Coordinate Measuring Machine?
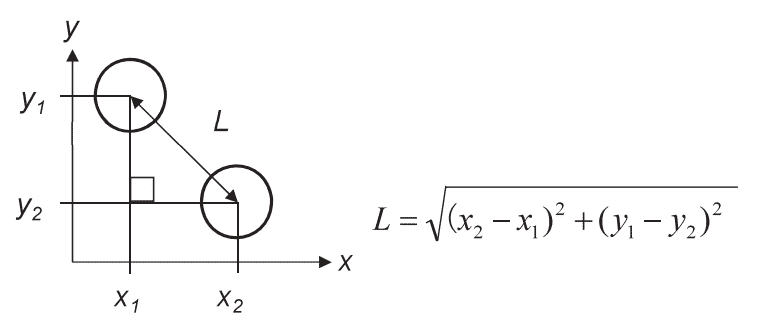
A three-dimensional coordinate measuring machine (CMM) is a contact measuring machine using a measuring instrument with a ball at the tip. When measuring mechanical parts, etc., length may be measured using a saw to or micrometer, but in this case, the length and position relationship between the elements combined are limited to the length measurement by the element alone (for example, the diameter of the circle defined by the center point of multiple circles. or the position of the intersection on the extension of the line). In CMM, the object is measured as a point (coordinate) and the element is calculated, so it is possible to perform precise measurements such as angle, the positional relationship between elements, contour shape, geometric deviation, etc. as well as the length of complex three-dimensional objects.
CMM Measure Elements
How to use CMM Coordinate Measuring Machine? The measurement principle of the CMM is as follows:
The machine memorizes the center coordinates of the sphere when the sphere at the tip of the measuring instrument touches the object to be measured. From this collection of coordinate values, we calculate the elements (straight lines, planes, circles, spheres, etc.). The factors you want determine how many points you need. For example, a minimum of two points is required to find a straight line. Three points are required for the face, three points for the circle, and four points for the sphere.

The positional relationship between the elements thus obtained can also be determined by calculation.

Objects Suitable for CMM Measurement
When is the coordinate measuring machine best used?
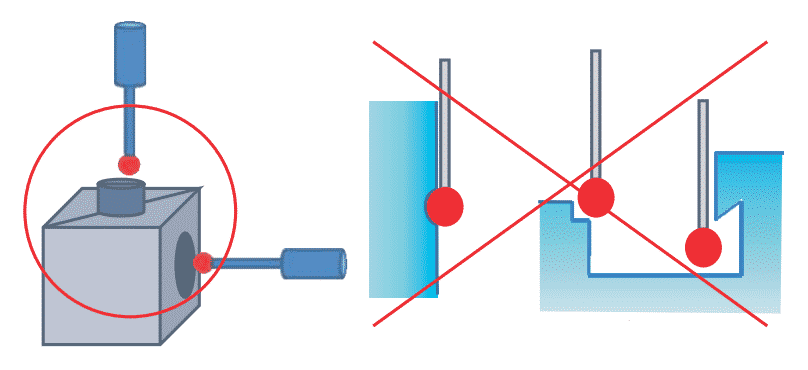
Since the CMM is a contact type measuring machine, the measuring instrument is pressed against the object during measurement. The measurement pressure is small, but still not completely zero. Therefore, it is not suitable for measuring soft things such as rubber or sponges, or things that may deform like thin pins or thin plates. In addition, it is not possible to measure places where the tip ball of the measuring instrument does not touch (minute steps or complicated shapes).
The error will be large in places where there is only a part of the shape, such as the R part of the chamfer, and the number of measurement points is limited for measurement of free-form surfaces, so it is still not suitable. On the other hand, positional relationships between elements on different surfaces, such as the top and sides of the solid, can change the direction of the probe, so it is possible to measure using the characteristics of the CMM that cannot be imitating with other measuring machines.

Key Points To Ensure the Accuracy of CMM Measurement
How to avoid the error of CMM measurement?
When measuring, it is necessary to carefully select the size of the sphere at the tip of the stylus, the position of the measurement point, the measurement direction, and so on. If you make a mistake in this selection, the error will increase.
(A) Stylus
The stylus should be as simple as possible and the length should be as short as possible. If the length of the stylus shaft is long, the shaft will bend when it comes into contact with the object to be measured, reducing accuracy. In addition, the larger the size of the sphere at the tip, the more the effect of the surface roughness of the measured object is averaged.
(B) Measurement Point
Pay attention to the position and number of measurement points.
For example, when measuring a circle element, the circle can be determined if there are three measurement points, but the accuracy depends on the position of the measurement points. Generally, if you want to make accurate measurements on circular elements, it is better to measure within the range of 180 ° to 270 °.
Regarding the relationship between the number of measurement points and accuracy, in the case of a circular element, the accuracy improves as the entire circumference is measured evenly and the number of measurement points increases. However, since the accuracy becomes stable when the number of measurement points increases to some extent, 8 points should be used as a guide for circular element measurement, and if more accurate measurement is required, the number of points should be increased a little.
By evaluating other factors as well, rather than using the minimum number of measurement points required, it is possible to reduce the impact of irregular points due to dust and dirt. It is possible and highly accurate measurement is possible.
(C) Measurement Direction
The measurement direction must be perpendicular to the measurement surface. Since the CMM recognizes the center coordinates of the sphere at the tip of the stylus, the sphere diameter is corrected in the measurement direction during calculation. Therefore, if the contact is made at an angle to the measurement surface, the measurement point may shift.
Alternatively, it may slip at the time of contact and measure at a point different from the target location.
Use of IOQC CMM Service
At the IPQC, CMM service can be used as an open device. Our staff will guide you on how to operate it, so even beginners can measure it. Also, if it is difficult for you to measure by yourself due to complicated shape, or if you want more accurate measurement, we can accept it as a requested test, so please feel free to contact us.