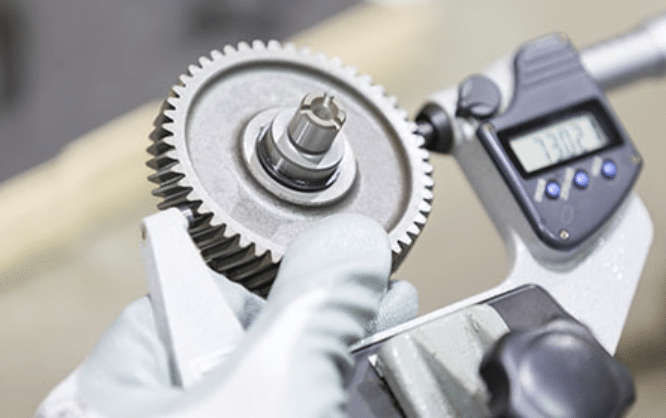
Performing dimensional inspection requires suitable tools to get the best results. What tools are commonly used in dimensional inspection and what are the main types of methods applied?

What Tools are Used in Dimensional Inspection?
Dimensional inspection tools are used to measure the physical characteristics of a part or product to ensure that it meets the required specifications. There are many different types of dimensional inspection tools, including:
- Calipers: used to measure the distance between two points on a part or product. They are commonly used to measure the diameter of a round object or the thickness of a flat object.
- Micrometers: Micrometers are used to measure very small distances with high precision. They are commonly used to measure the thickness of thin materials or the diameter of small objects.
- Height gauges: Height gauges are used to measure the height of a part or product. They are commonly used to measure the height of a step, the depth of a groove, or the height of a surface relative to a reference surface.
- CMMs: Coordinate measuring machines (CMMs) use a probe to measure the three-dimensional coordinates of a part or product. They are commonly used for high-precision inspection of complex shapes and geometries.
- Optical comparators: Optical comparators use a magnifying lens and a light source to compare a part or product to a template or drawing. They are commonly used for visual inspection and for checking the dimensions of small parts.
- Surface roughness testers: Surface roughness testers are used to measure the roughness of a surface. They are commonly used in industries where surface finish is critical, such as in automotive and aerospace manufacturing.
- Thread gauges: Thread gauges are used to check the accuracy of screw threads. They are commonly used in industries that require precision screw threads, such as in the production of bolts, nuts, and other threaded components.
How to Select Dimensional Inspection Tools?
There are some key factors to consider when selecting dimensional inspection tools.
- Part characteristics: The characteristics of the part or product being inspected, such as its size, shape, and surface finish, will influence the selection of inspection tools. For example, parts with flat surfaces may be better suited for contact inspection tools like calipers, while parts with complex geometries may require non-contact inspection tools like CMMs or laser scanners.
- Required accuracy: The required level of precision and accuracy for the inspection will also influence the selection of inspection tools. For high-precision applications, tools with higher levels of accuracy, such as micrometers or CMMs, may be required.
- Inspection environment: The inspection environment, such as temperature and humidity, may also influence the selection of inspection tools. Some tools may be more sensitive to changes in environmental conditions than others.
- Equipment and resources: The availability of equipment and resources will also impact the selection of inspection tools. Some tools may be more expensive or require specialized training to use, which may not be feasible for all applications.
- Industry standards and regulations: The selection of inspection tools may also be influenced by industry standards and regulations, which may specify certain types of tools or levels of accuracy for certain applications.
It may be helpful to consult with a qualified dimensional metrologist or other experts to help determine the best inspection tools for a particular application.
Main Types of Dimensional Inspection Methods
- Contact inspection: involves physically touching the part or product being inspected with a measuring tool, such as a caliper, micrometer, or height gauge. Contact inspection is typically used for parts and products that have flat, round, or cylindrical surfaces.
- Non-contact inspection: involves using a non-contact measuring tool, such as a CMM, laser scanner, or optical comparator, to measure the dimensions of a part or product without physically touching it. Non-contact inspection is typically used for parts and products that have complex shapes or geometries that cannot be easily measured with contact inspection tools.
Both contact and non-contact inspection have their advantages and limitations. Contact inspection is generally more accurate and reliable for measuring simple geometries, while the non-contact inspection is better suited for measuring complex shapes and contours.